What Tools Do I Need To Remove An Engine?
Disclaimer: This post may contain affiliate links. As an Amazon Associate, we earn from qualifying purchases.
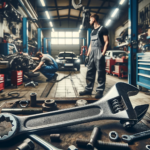
Got a car in your garage that needs major engine work, and you want to do it yourself? The first thing to sort out is which tools you actually need to pull the engine. This guide gives you a clear list of the gear that gets the job done, whether this is your first time or you’ve turned a few wrenches before. Roll up your sleeves and let’s get into it.
Engine Removal Basics
Understanding engine removal process
Pulling an engine looks intimidating, but it’s manageable once you have the right gear and a clear plan. You’ll disconnect everything tied to the engine, secure it, then lift it out of the bay. Knowing the order of those steps and lining up your tools beforehand makes the whole job go a lot smoother. Since you’ll be running a socket set through nearly every bolt on this job, it’s worth checking out our rundown of the best socket set for a professional mechanic before you commit to one.
Ensuring safety during engine removal
Safety comes first on any engine job. Wear safety goggles, gloves, and coveralls to shield yourself from debris, oil, chemicals, and moving parts. Chock the wheels so the vehicle can’t roll, disconnect the battery to avoid electrical shorts, and keep a fire extinguisher within reach.
General Tools
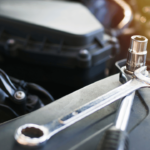
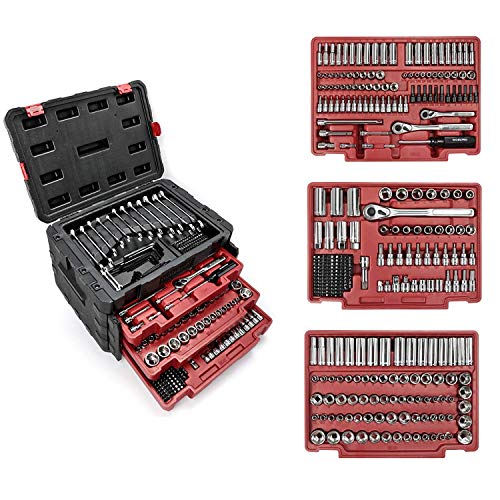
Socket set
A socket set is the backbone of any engine removal. You’ll use the different socket sizes to loosen and tighten bolts and nuts all over the engine. The ratchet handle lets you spin fasteners off quickly without resetting your grip every turn.
")
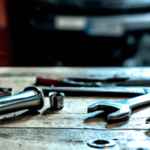
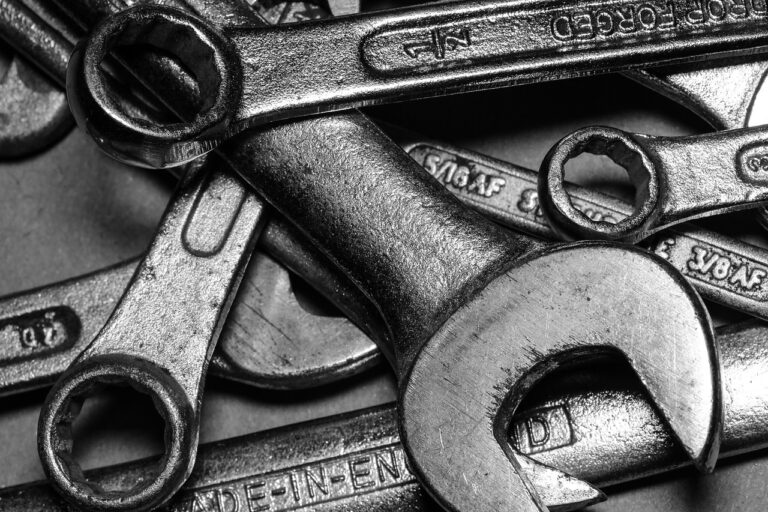
Wrench set
Wrenches reach the tight spots a socket can’t. Keep both open-end and box-end wrenches in a range of sizes so you can break loose stubborn nuts and snug them back down in cramped corners.
Screwdriver set
Screwdrivers handle the screws and small fasteners you’ll run into along the way. Pack a mix of flathead and Phillips in several sizes so you’re not stuck fighting a screw with the wrong tip.
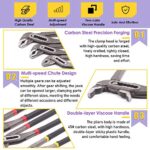
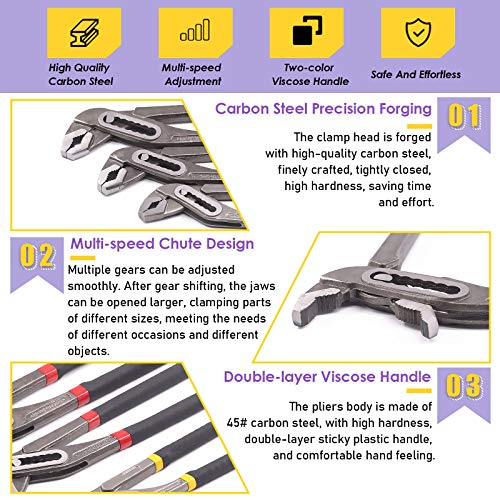
Pliers
Pliers grip, bend, and cut wires and hoses when nothing else fits. Keep slip joint pliers for general gripping and needle-nose pliers for getting into tight spaces.
Hammer
A hammer helps free seized bolts and taps stubborn parts back into place. Use one with a soft, non-marring head so you don’t dent or crack delicate engine components.
Torque wrench
A torque wrench tightens fasteners to the exact spec listed in your service manual. That precision keeps you from stripping threads with too much force or leaving bolts loose enough to back out later.
Ratchet straps
Ratchet straps hold the engine steady while you lift it. They keep it from swinging or shifting as it clears the bay, which protects both you and the surrounding parts.
Trolley jack
A trolley jack, or floor jack, raises the vehicle to give you room to work underneath. Pick one with enough weight capacity for your vehicle and a wide, stable base so it won’t tip while loaded.

Engine crane
An engine crane, sometimes called a cherry picker, does the heavy lifting of pulling the engine out of the bay. The hydraulic ram raises the load while the adjustable boom reaches in to grab it. A solid, well-built crane is the one tool you can’t cut corners on.
Shop towels
Shop towels wipe oil, grease, and grime off parts and your hands. Keeping a stack nearby helps you stay clean and keep track of what you’re doing.
Specific Engine Removal Tools
Engine hoist
An engine hoist does the same lifting job as a crane but in a smaller, more portable package. It’s a good fit for tight garages or when you don’t have a full-size crane on hand.
Engine stand
An engine stand holds the engine securely once it’s out of the vehicle. It lets you spin the engine and reach every side for inspection, repair, or a rebuild without wrestling its weight.
Engine support bar
An engine support bar holds the engine up while you disconnect the mounts. Spreading the weight evenly keeps the mounts from getting damaged and gives you a controlled, predictable lift.
Engine lift plate
A lift plate bolts to the engine to give your hoist or crane a solid spot to hook onto. That secure connection keeps the engine balanced and prevents damage as you raise it.
Flywheel locking tool
A flywheel locking tool stops the flywheel or flexplate from spinning while you loosen or tighten bolts. You’ll want it on hand for jobs like pulling the crankshaft pulley or swapping the clutch.
Timing gear puller
A timing gear puller pulls the timing gears or sprockets off the engine without prying or hammering. You’ll need it when replacing a timing belt or chain.
Crankshaft pulley holder
A crankshaft pulley holder keeps the pulley from turning while you loosen or torque the center bolt. Holding it steady lets you apply full force without spinning the engine or damaging anything.
Gasket scraper
A gasket scraper strips old gasket material and dried sealant off mating surfaces. A clean, smooth surface is what makes the new gasket seal properly when you put things back together.
Hose clamp pliers
Hose clamp pliers grab and squeeze hose clamps so you can slide them on or off. Their shape reaches clamps tucked in awkward spots where regular pliers slip.
Oil filter wrench
An oil filter wrench grips the filter so you can twist it loose or snug it down. The firm hold keeps you from crushing the filter or skinning your knuckles.
Miscellaneous Equipment
Safety goggles
Safety goggles keep debris, chemicals, and sparks out of your eyes while you pull an engine. Keep them on the whole time.
Gloves
Gloves shield your hands from sharp edges, hot surfaces, chemicals, and grime. Pick a pair that fits well and still lets you feel what you’re doing.
Coveralls
Coveralls keep grease and oil off your clothes and skin. Full-body coverage means you stay clean and can focus on the job.
Fire extinguisher
Fuel and electrical work can start a fire fast. Keep a charged extinguisher within arm’s reach so you can act the second something goes wrong.
Floor jack
A floor jack gives you extra lifting power alongside your trolley jack. You’ll have more options for raising the vehicle to the height you need.
Wheel chocks
Wheel chocks lock the tires so the vehicle can’t roll while it’s up on jack stands. Slip them in before you start and the car stays put.

Drip pan
A drip pan catches oil, coolant, and other fluids before they hit the floor. Your workspace stays clean and you keep those fluids out of the ground.
Wire brush
A wire brush scrubs away rust, caked dirt, and grime from engine parts. Clean surfaces make inspection and reassembly far easier.
Bungee cords
Bungee cords hold loose wires, hoses, and brackets out of your way. Strap them back and you avoid snagging or damaging parts as the engine comes out.
Mechanic’s creeper
A mechanic’s creeper is a wheeled board you lie on to roll under the vehicle. It gets you to tucked-away spots and saves your back and knees.
Supporting Accessories
Extension bars
Extension bars add length between your ratchet and socket so you can reach deep or buried bolts. They make tight engine bays a lot more manageable.
Universal joint
A universal joint, or u-joint, is a flexible link between your ratchet and socket. It bends to an angle so you can reach bolts you can’t line up straight on.
Socket adapters
Socket adapters change the drive size so a socket fits a ratchet it normally wouldn’t. One ratchet can then run sockets from different sets.

A flex head ratchet has a hinged head that swivels to different angles. That swivel lets you work in cramped spots where a fixed ratchet won’t fit.
Rubber mallet
A rubber mallet lets you tap parts into place without leaving marks. You get the force you need without cracking or denting anything.
Power drill
A power drill speeds up driving bolts, drilling holes, and running attachments. It saves your wrist and shaves time off repetitive jobs.
Wire connectors
Wire connectors like butt and crimp connectors join electrical wires and hold them tight. Solid connections keep you from chasing short circuits or loose wiring later.
Electrical tape
Electrical tape wraps and insulates your connections. It keeps moisture and dirt out so the connection holds up over time.
Silicone sealant
Silicone sealant seals the gap where two engine surfaces meet. It blocks leaks and keeps contaminants out, which matters most when you’re putting things back together.
Thread locker compound
Thread locker keeps bolts and nuts from backing out under vibration. A drop on the threads bonds them so your fasteners stay tight for the long haul.
Diagnostic Equipment
OBD2 scanner
An OBD2 scanner plugs into your car’s diagnostic port and reads trouble codes. It pulls live data so you know what’s wrong before you start pulling things apart.

Compression tester
A compression tester measures the pressure in each cylinder. Low or uneven readings point to worn piston rings or bad valves.
Vacuum gauge
A vacuum gauge reads the pressure in the intake manifold. The needle’s behavior tells you about engine health and can flag vacuum leaks or poor combustion.
Digital multimeter
A digital multimeter measures voltage, current, and resistance. You’ll use it to test sensors, track down electrical faults, and confirm your connections are solid.
Fuel pressure gauge
A fuel pressure gauge reads the pressure in the fuel system. The number tells you if the pump is failing, a line is clogged, or the regulator has gone bad.
Oil pressure gauge
An oil pressure gauge shows how well the lubrication system is doing its job. A weak reading warns of a failing oil pump or blocked oil passages.
Coolant pressure tester
A coolant pressure tester pumps up the cooling system so you can hunt for leaks. It reveals weeping hoses, a bad radiator cap, or a blown head gasket.
Timing light
A timing light checks and sets the ignition timing. It flashes in time with the spark plug firing so you can dial in the engine for the best performance.
Fuel injection tester
A fuel injection tester checks how your injectors are working. It measures fuel pressure, injector pulse, and spray pattern to pinpoint a fuel delivery problem.
Ignition spark tester
An ignition spark tester clips to a spark plug wire and shows you the spark. You can see at a glance whether it’s strong and steady or weak, which points straight to ignition trouble.

Lubricants and Fluids
Engine oil
Engine oil keeps the moving parts slick so they don’t grind and wear out. Have the right type and grade on hand for the reassembly stage.
Coolant
Coolant, also called antifreeze, holds the engine at a safe temperature and stops it from overheating. Use the correct type and mix ratio for your cooling system.
Transmission fluid
Transmission fluid lubricates and cools the gearbox internals. If you’re splitting the transmission from the engine, have the right fluid and amount ready to refill.
Brake fluid
Brake fluid runs the braking system, so check the level while you’re in there and top it off if it’s low. Good brakes are not something to leave to chance.
Power steering fluid
Power steering fluid helps you turn the wheel with less effort. Check the level and top it up if needed so steering stays smooth while you work through the engine removal.
WD-40 or similar penetrating oil
Penetrating oil loosens rusted or seized bolts and nuts. Spray it on stubborn fasteners and give it a few minutes before you try to turn them. This saves you from stripping threads or snapping a bolt.
Thread locker
Thread locker keeps bolts and nuts from backing out under vibration. Put a small dab on the threads before installing fasteners and they stay put without constant retightening.
Gasket sealant
Gasket sealant adds an extra layer of protection against leaks between engine surfaces. Apply it to gaskets or mating surfaces before you bolt parts back together for a tight, leak-free seal.
Silicone lubricant
Silicone lubricant is great for rubber seals and similar parts. It keeps things moving smoothly and stops rubber from tearing or sticking while you work.
Anti-seize compound
Anti-seize compound stops bolts and nuts from corroding or fusing in place from heat. Brush it on the threads before installing and the fasteners come out easily next time.
Safety Precautions
Disconnecting the battery
Disconnect the battery before you touch anything. This cuts power to the system so you avoid shocks and protect the sensitive electronics from accidental damage.
Wearing protective gear
Wear safety goggles, gloves, and coveralls. They shield your eyes from debris, keep chemicals and grime off your skin, and protect you from moving parts.
Securing the vehicle
Lock the vehicle in place before you start. Park on a level surface, set the parking brake, and slide wheel chocks behind the tires so the car can’t roll.
Depressurizing fuel system
Relieve the fuel system pressure before you work on the engine. This stops fuel from spraying or leaking and cuts the risk of fire. Check your vehicle’s service manual for the exact steps, since they vary by model.
Properly supporting the engine
Support the engine fully so it doesn’t drop or swing. Use an engine crane or hoist along with a support bar or lift plate to spread the weight evenly and lift safely.

Keeping a fire extinguisher nearby
Keep a working fire extinguisher within arm’s reach. Check that it’s charged and ready, so you can act fast if fuel or fumes catch fire.
Ensuring electrical disconnection
Confirm the electrical system is fully disconnected or isolated before you touch any wiring. This keeps you from getting shocked and protects the electronics from damage.
Working in a well-ventilated area
Work where air moves freely. Pulling an engine releases fluids and gases, so good airflow keeps harmful fumes from building up around you.
Being cautious with hot and moving parts
Watch out for hot surfaces and moving parts. The exhaust, radiator, and fan hold heat long after the engine shuts off, and belts and pulleys can grab your fingers if you’re not careful.
Avoiding excessive strain or lifting
Engine parts are heavy, so don’t lift more than you can handle. Bend at the knees instead of the waist, and get a hand or a tool when something is too much. That’s how you save your back.
Step-by-Step Engine Removal Process
Preparing the vehicle and work area
Get the vehicle and workspace ready first. Secure the car, disconnect the battery, and lay out your tools so they’re within reach. Clear the clutter and add good lighting so the job goes smoothly.
Disconnecting the battery
Start by disconnecting the battery. Loosen the negative terminal first with the right wrench and pull it clear. With no power running through the system, you avoid sparks and accidental shorts.
Removing auxiliary components
Next, take off the auxiliary parts: the air intake, radiator, cooling fan, and belts. You’ll undo bolts, clamps, and fasteners and pull off hoses and electrical plugs. Label each connection as you go so reassembly is painless.
Unbolting and disconnecting drivetrain
With the accessories gone, unbolt and disconnect the drivetrain. That means the driveshaft, exhaust, transmission, and anything else tied to the engine. Support these parts so they don’t drop or bind as you free them.
Securing the engine for removal
Lock the engine down before you lift. Run ratchet straps or chains to solid lifting points on the engine, hook them to your crane or hoist, and pull them tight. A snug setup keeps the engine from swinging or shifting mid-lift.
Detaching engine mounts
With the engine strapped, detach the engine mounts from the frame or crossmember. Remove the bolts and ease the mounts off their points. Keep the engine supported the whole time so nothing drops suddenly.
Lifting the engine with hoist
Now raise the engine out of the bay with your crane or hoist. Go slow and keep the lift even. Watch for anything still in the way and adjust as you go to keep the whole thing controlled.

Clearing the engine bay
As the engine rises, clear the bay of anything still attached. Unplug wiring harnesses, disconnect hoses, and move stray parts out of the path. This gives the engine room to come out clean.
Complete engine removal
With the bay clear and the engine lifted high, guide it out of the vehicle. Keep it level and steady, and make sure it clears everything around it. Steady hands here prevent dings and accidents.
Post-removal tasks and cleanup
Once the engine is out, look it over for damage and wear. Label your connections and parts for reinstallation, then tidy up the work area. Store the engine somewhere safe so it stays clean and undamaged until you need it.
Additional Tips and Considerations
Keeping organized during disassembly
Stay organized and keep track of every component, fastener, and connection as you go. Use labeled bags or containers for small parts, snap photos or sketch diagrams, and work through the job in a clear order. This keeps the teardown clean and saves you headaches later.
Labeling wires and components
Label wires and components as you disconnect them. Colored tape, sticky labels, or a marker all work fine. This way everything goes back exactly where it belongs, and you avoid electrical or mechanical trouble when the engine goes back in.
Documenting the removal process
Photos, videos, and written notes become a lifesaver when you reassemble the engine or chase down a problem later. Document each step so you have a reference to look back on when something doesn’t line up.
Inspecting and replacing worn parts
With the engine out, you have easy access to inspect parts that are usually buried. Check belts, hoses, gaskets, and seals for wear, damage, or leaks. Replace anything that’s worn now, while it’s simple to reach, so the engine runs right once it’s back in.
Using proper lifting techniques
Engine parts are heavy, so lift smart to protect your back. Bend at the knees, lift with your legs, and let a crane or hoist do the real work whenever you can. A strained back will sideline a project fast.
Following manufacturer guidelines
Keep your vehicle’s service manual close and follow what it says. It tells you the right torque values, the correct order to loosen things, and other details that keep you from damaging parts or systems you can’t easily see.
Seeking professional assistance if unsure
Stuck or unsure about a step? Call in a professional or experienced mechanic. They can talk you through it, point you in the right direction, or handle the removal so the job stays safe and gets done right.
Properly storing and handling removed engine
Once the engine is out, store it carefully so it doesn’t get damaged or dirty. Keep it in a clean, dry spot away from dust, moisture, and big temperature swings. Throw a protective cover over it to guard against knocks and contaminants.
Taking necessary precautions during reinstallation
Putting the engine back in calls for care. Line up components correctly, torque bolts to spec, and double-check that every connection is tight. Lean on the service manual for the exact steps so the install holds up and runs reliably.
Performing engine diagnostics upon removal
With the engine out, it’s a great chance to run some diagnostics and catch hidden problems. An OBD2 scanner, compression tester, and digital multimeter let you check the engine’s health and condition. Whatever the tests turn up can be repaired now, before you bolt everything back together.
Pulling an engine sounds intimidating, but with the right tools and a clear plan you can do it. Know the steps, keep your safety gear in place, and have the tools you need within reach. Whether you wrench for a living or do this for fun, careful planning, good organization, and attention to detail make for a smooth removal.
If you’re not sure which wrenches to add to your kit, our guide on how to choose a wrench walks through the types and sizes worth keeping on hand for engine work.